Wednesday, March 25, 2015

I've been Sewing Again!!!


A new pattern from Lorelei Jayne and it's a beauty!!!

the BG Bag

The BG Bag was released on Etsy last night and I believe it's going to be a winner for this little cottage business.  I found it very easy to follow and make up.  To be honest the most time consuming and complicated part of the creative process was getting my iron hot enough to iron the interfacing to my selected fabric. Yup it really is THAT easy!!  And besides easy it is versatile. 

When you purchase the pattern it not only includes the handbag pattern that I made and have pictured here, but also a beach bag size which can easily be converted for multiple uses...  I'm thinking with the addition of some simple pockets you can have a basic nappy bag, and then with or without pockets you have a WIP (work in progress) craft keeper, knitting/crochet bags with oodles of room to store your projects as well as the pattern, needles, hooks,  additional supplies etc...  As a beach bag there is plenty of room inside for a towel, change of cloths, thongs (or flip-flops, jangles, etc whatever they are called in your part of the world) and sunscreen. 


The bag is easy to accessorise as well. There are instructions for a magnetic closure.  It is able to be completed to be fully reversible and with a little tweaking you can change the handles to attach with D rings for a little added personality.  I made a little key fob to go with my bag which I filled with some beautiful dried heads of organic lavender - it really does smell divine!!!


In summary I am absolutely loving this design and pattern.  I can't wait to get stuck into making some more and experimenting.  I'm planning to make myself a new handbag after my lovely black and white expensive number recently died.  I'm also going to make something a little less restrained for my teenage daughter and a few craft bags and a nappy bag...  Oh my "to-do" list keeps growing and growing!!!  Actually, I think a trip to spotlight may just be added to my "to-do" list for tomorrow so I can select the perfect fabric for my next BG Handbag ;)

Wednesday, December 10, 2014

A Test Sewer... Success!!!!


 The 
Little 
Girl 
Bag
                                  
 designed by Lorelei Jayne


This week I was given the opportunity to be a test sewer for a pattern which was re-launched today.  The Little Girl Bag by Lorelei Jayne is just sooo cute!

It's a quick sew (I made it in an hour with all the interruptions 6 children are likely to give) and very easy to follow.  


This bag is fully lined and can be made from a whole range of fabrics.


Mix and match the pieces in complimentary fabrics or add some embellishments for a bag fit for a princess.  Oh and boys don't miss out either - make it out of plain or boyish fabrics and it is a versatile bag for carrying matchbox cars or blocks or even filling with dirt (as our Toby loves to do) 


Seriously a very easy pattern, quick sew, multiple uses and design applications and FREE!!!!  


Check it out on the Lorelei Jayne Blog HERE  or on their FB Page HERE


Whoops... that didn't go far....

I mean, I did do some work on my "word" and no doubt will sign up for it again next year...  But blogging my crafty ventures didn't go far... once again being a mum took over...  Next year though.... Ahhh famous last words ;)  

In all seriousness I HAVE done some crafty stuff this last few weeks and am putting actions into place for it to continue.  I've dug out some sewing bits and pieces and have been making some items for the kidlets and will soon start stockpiling times to sell in an online store I am opening in early 2015.  The Simple Life is still in the planning stages, however I have several trusted and well loved companies on board to stock their wares and hopefully help build a successful venture.  

I'm making a more concerted effort to do some "me" things... one of these things is crafty stuff.. sewing, knitting, scrapbooking etc etc...  Some ties in with a little business venture which will formally launch early 2015.  It's something that I really feel soothes my soul and allows me to be more me (that probably does't make much sense)

So I unpacked my new sewing machine a couple of weeks ago.  It's nothing flash, a spotlight rebranded machine - Elna 40 (rebranded Janome Magnolia or Janome 8077 - there are differing views) and started cutting into my precious minky to make Toby a tag blanket.  He has a fascination for tags, rubbing them, threading them onto his fingers or just stroking them when falling asleep...  he will scout them out to help sooth him - to the point that I found him snuggling up to a pair of Aerynns knickers one day, stroking their size tag!!!!

Well one blanket evolved from under the sewing machines foot... and Toby LOVED it!  a smallish, patchwork blue minky one one side, quilting cotton the other with numerous different size, thickness and width tags on its outer edges.  I fastened a ribbon tag with a snap on it so the blanket can also be secured to prams and trolls for added reassurance it won't be lost.  

Tag blanket getting the snooze of approval, Adelaide Nov 2014

I thought all was well until Miss Aerynn spotted Toby's new blanket... and insisted she needed one too!  And in princess pink - seriously, she is such a little princess and pink is her favourite colour! So out came the minky stash, scissors and within an hour Miss A had her own matching Taggie blanket :)  


Two very happy little kidlets... and I swept out some of the cobwebs which my creative bug was starting to drown in :)  Now to do Domeniks minecraft weighted blankets, weighted toy, santa sacks for everyone, maybe a few other little projects in between... oh and starting on building up a supply of bits and pieces for the launch of "The Simple Life" online store - opening 2015!


Tuesday, January 7, 2014

Getting Back Into It!!!

Hello World!!  It's been a while since I've blogged here.  I'm not sure if anyone really reads blogs anymore, but well, I'm going to post here because I can and it stops me annoying friends on FB who aren't crafty and don't understand my enthusiasm for playing with paper, pens, glue, scissors etc etc etc.

Anyways, it's been so long that when I walked down the aisle at spotlight just the ohter day things have changed quite a bit!  My beautiful Epic is now on clearance sale!!!  And things that were new back when are now obsolete or superseded etc etc... so much new stuff, new brands, new ways of scrapping - I mean Project Life!?!!  I've joined a few groups to try and understand it more.. It's about simplifying I get that.. could help me get some memories scrapped in my current time poor state... 

Anyhoos.. Like I said, getting back into things.  Nothing big, but I have started the One Little Word project.  Something simple, once a month and I already had a word for the year so was pretty easy to compulsively hit the "buy now" button and join the crew ;)

So I dug out my smash journal I purchased 2 years ago - was still in it's original wrapping and untouched!  and I'm going to use that.  I brought a Project Life base cardpack, so that will help speed things along ;)   now to get in and watch January's lesson again without kids screaming and crying and get a start on it...

Oh in the meantime.. my word is...


Tuesday, January 31, 2012

366

I've committed to trying to complete the Photo a Day challenge again this year. So far so good!!! I'm adding a Tab on this page to keep a record of my year...In the meantime, all my images so far can be found on a few pages, including my Katami Photography facebook page and my Flikr

Tuesday, November 8, 2011

Why did I click that???

Becci, I blame YOU!!!!!

**sigh** there are SO many online stores filled with the most tempting fabric and Becci has introduced me to yet another... This one I've found the most delightful trims and ribbons I have no choice but to purchase to make some beautiful headband and accessories etc for my girls and for photo props **sigh**

Beach Vintage is the blog, Fabric Traders is their shop!!! They are currently running a special offer/give-away!!! Be one of the first 50 to blog about their new shop and telling people about your favourite fabric and you can win a suprise fabric pack!!! So I'm up for a chance at a game of "fastest finger" as the case may be ;)

So on perusal of the many pages of fabric I've finally drenched my crafty bib with drool and fallen in love with so much stuff (those ribbons - I must get me, no my daughters some!!!!) but my absolute fave fabric is one I could use for trims or as a feature piece, it is called "Pretty Butterflies Grey by Alexander Henry" I love the muted colours against the black background :)

It's natural beauty, soft and pretty with the ability to blend but still strong enough to stand alone if need be :)

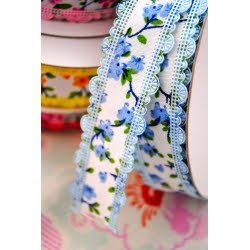
Soooo want a peek at the ribbons I've fallen in love with as well??? Here one is...


Imagine this as the top of a headband, held on the head with a back elastic and soft run of felt under the ribbon to help the science of friction hold it in place.... Ahhh sooo pretty!!!

Anyhoos, this isn't getting the housework done (thanks Becci :P) so better run now I've blogged, drooled and avoided the housework for yet another 20 minutes ROFL

And go check Beach Vintage or Fabric Traders out!!! And if your credit card or bank account become a little bruised in the process don't blame me, we can all thank Becci for inviting us to click the link!!!!

I Scrapped!!!

It's the first layout in ever so long, and it felt wonderful to get it done!!! If it wasn't for the gorgeous Charm having a Girls Night In evening I don't think it would be done though.. the ability to go out of the house and meet with like minded people is such a great influence in the ability of getting arty stuff done ;)

Anyhoos, here it is :)

Hush-a-bye Baby

It's a very simple LO for me, and is part of a 30 minute challenge or Speed Scrap that was on offer over at Red Earth Scrapping for their pink weekend. There's a little bit of fussy cutting of the base paper to allow the photo to settle under the pattern, then some layers of washi tape from D'lish Scraps (thanks for letting me use you're Charm!!!) and of course some Charms Creations products, the page runner at the base of my photo and a Fabulous Flower :) So nice and easy, but I love how it came together :)

Having this page completed and some time to myself makes me hungry for more.... I really want to sink my teeth into some more scrapping, but at the moment baby girl has other ideas with what I should be doing with my time ;) I know my scrappy time will come, it wont be that far away - at the moment baby girl has to come first... They are only this small for a short amount of time and she is definitely our last so I am soaking up every second I can and creating as many new baby memories as possible <3

Monday, August 29, 2011

Did Ya Miss Me???

Yeah a long time between posts I know **blush** But in that time I've done something absoutely amazing :) I've brought our little baby girl earthside!!!!

Aerynn Paige Nalani Bricknell was born on her due date at home, in water and with no complications at all. She is absolutely perfect in every way imaginable <3 yes we are totally besotted by our littlest princess :) As for stats, she was 48cm long and weighed in a HUGE (not) 2890g (6lb5oz) I've lots of photo's (that should come as no suprise!!!) but here's a few just to share...

12 hours old


14 hours old
with littlest big brother Domenik

13 Days Old
playing (un)dress-ups

13 days old

Wednesday, June 15, 2011

2 Posts in 1 day!!!

Yeps, this has to be a record I'm sure!!!

Last night I completed another LO for the RES RERT... This time for week 2 where we 'visited' Lake Argyle in WA! I'm loving the fact that these 'challenges' are hop on, hop off, meaning no pressure - also they're not overly difficult so anyone can participate regardless of skill or energy levels ;)

Once again I've incorporated some Words or Whatever chipboard into my LO (don't forget to check out their new DT call!!!). I absolutely ADORE this little chippie sign :) I've simply inked and embossed this one - sooo simple!!! The little centre of the sign is removable, I was going to journal but decided against it in the end... There's a gorgeous handmade flower from Pretty Paper Petals (the yellow/orange one under the sign - and don't forget the store is re-opening July 1st!!! There's sneaks of new designs coming up on their blog now **swoon**) and one of Treens Trinkets soon to be released Bingin' Birds nestled in amongst the flower cluster... Umm what else is there?? Hand dyed lace from Lovelybug Bits n Bobs and hand crochet lace by Becci at Lime Tree Creations... Prima goodies, mini doily, Ada flowers, ZVA bling and I think the mini roses as well all from Red Earth Scrapping and star flowers from My2Angels... Whoo, I think that's everyone who needs crediting!!!

RERT - Week 2 - Lake Argyle

In honour of this area being famous for their pink diamonds participants were to complete a LO using PINK!! Not necessarily ALL pink, but noticable...

And the bonus item clue this time was "They are a girls best friend"

"I'm So Pretty Mummy"

Anyone who knows me knows how much I struggle with pink - mostly because my daughter has to be one of the worlds biggest tom boys, and pink tends to clash badly with the colour of her hair... Anyways I did it!!!! the fact she was covered head to foot in pink lipstick helped with the colour challenge LOL

And a close up of the gooooorgeous WOW chippie and Pretty Paper Petals flower... I love the pink, aqua and yellow colour combo!!!

Tuesday, June 14, 2011

I Might Still Have It!!!!

The ability to do a decent enough LO to take out a scrapping challenge that is!!!! I received notification yesterday that my Bee LO won a prize in the challenge on Red Earth Scrapping!!! Yay!!! Considering it was my first proper LO in soooo long I'm really thrilled with that!!! :) I'm still easing my way back into scrapping and the scrappy world, I'm taking it one thing at a time ;) I've been looking around for little challenges that pique my interest and things that I don't feel pressured to have to complete 3-4 LO's in a set amount of time... taking it REALLY easy :)

Bee
a Winning Lo!!!

I have completed another LO and a card of sorts **gasp** yes a card - I'm working out that I'm not very good at cards hahhaa Anyways they were both for the Red Earth Road Trips first week.. I did it!!! LOL They're by no means my best work - actually a little different than what I'd normally do, but completed, another photo from the pile scrapped and I know that in good time I'll be shaking my head wondering what on earth I was thinking of when I did the LO hehe

RERT - Week 1 - COWRA

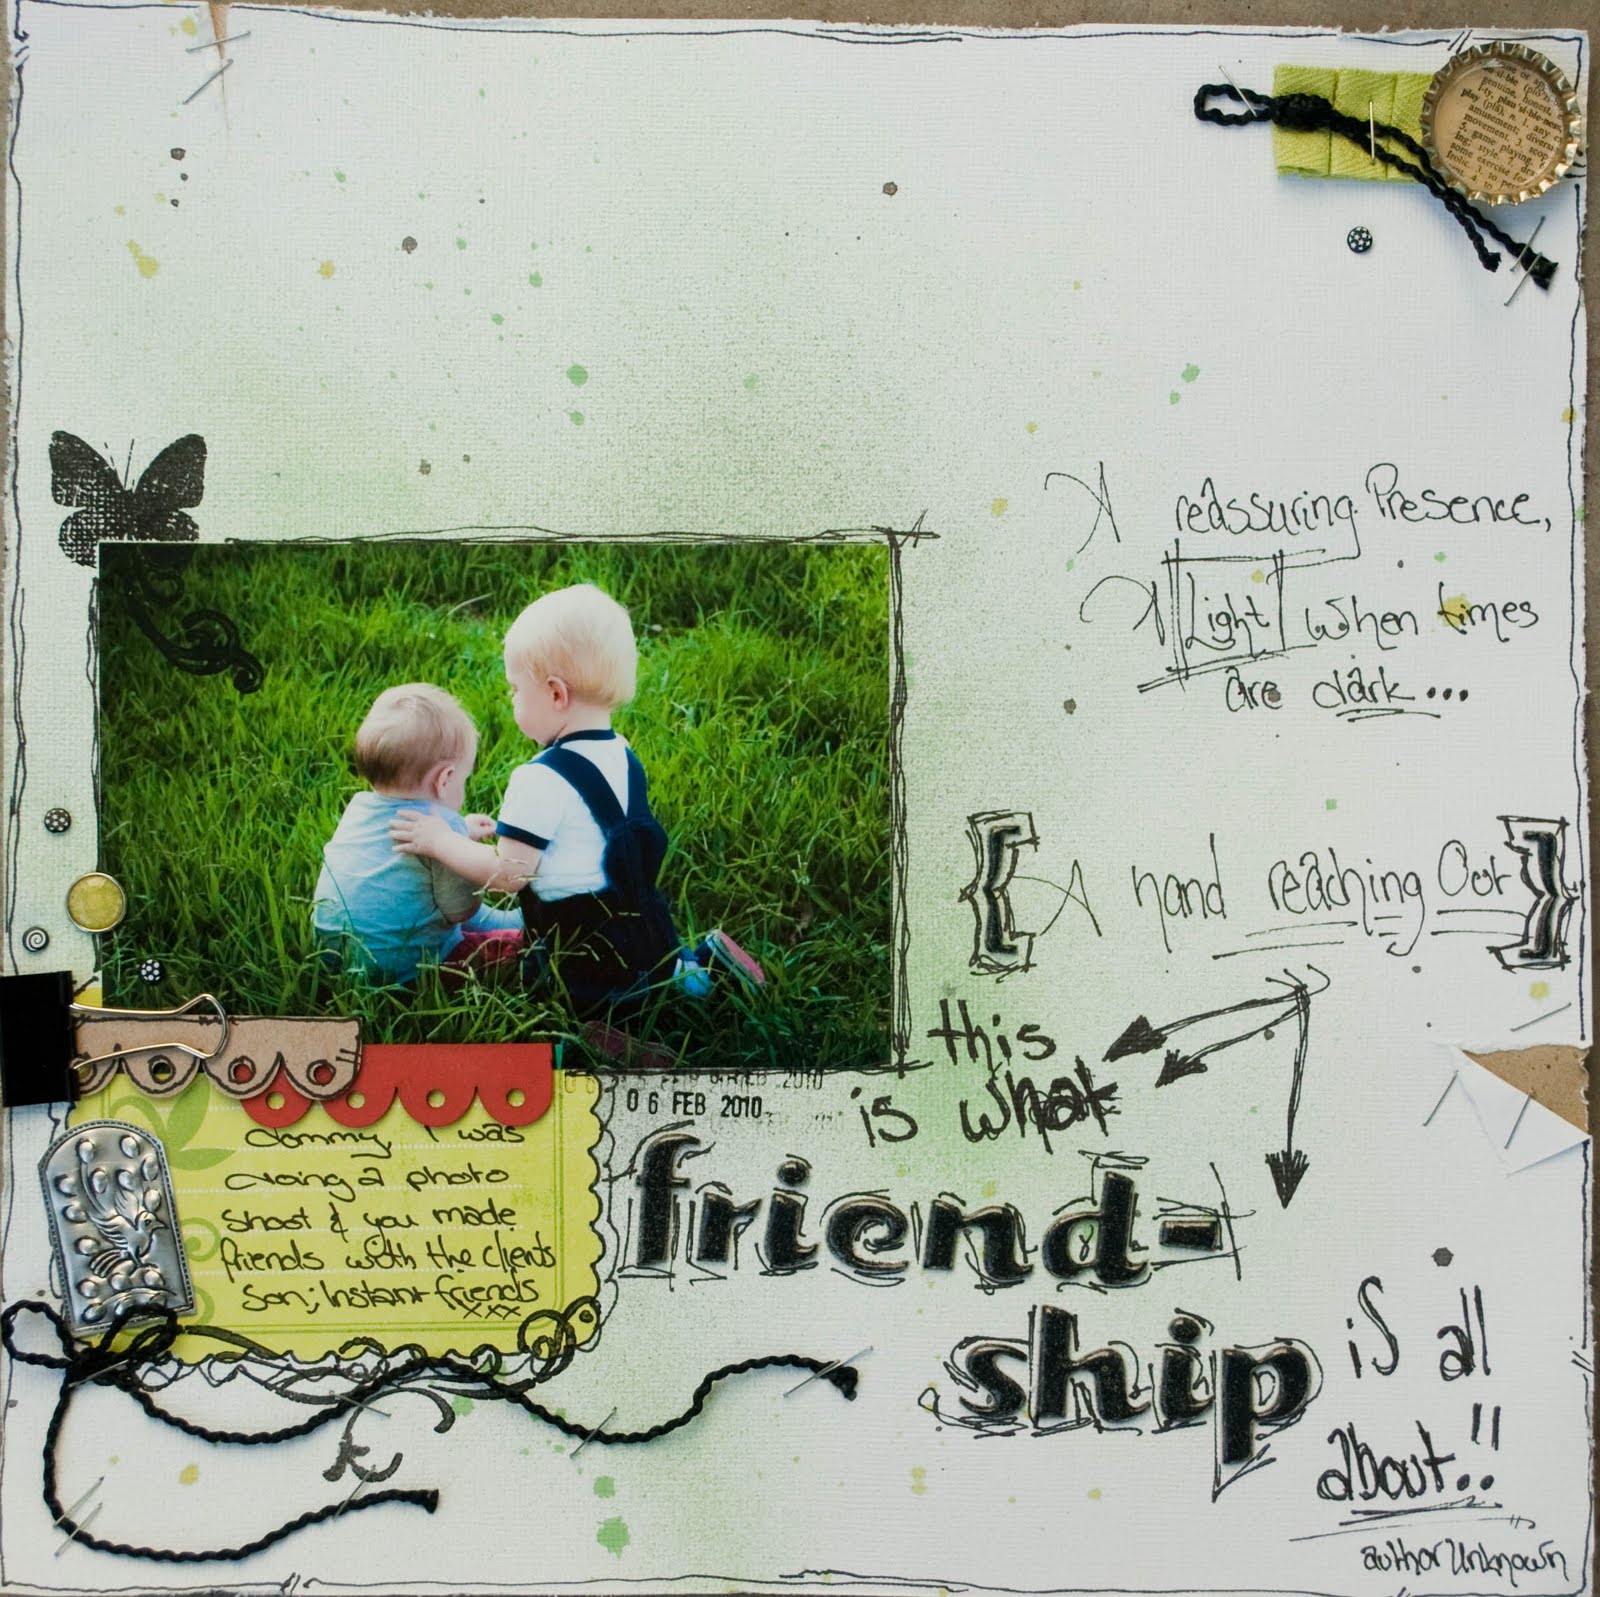
So this week we 'visited' Cowra. The challenge elements for this LO were based on Cowra being renowned for its Peace Bell, its Centre of World Friendship and the Japanese Gardens and links with Japan. We were to create a LO incorporating something that represents Peace of Friendship and they were to include the word "peace" or "friendship" in the title.


My LO is a photo from when I did a shoot for a friend/client back when I was portfolio building and working towards starting a business in photography (on the backburner at the moment for obvious reasons.. baby, time, lack in clients etc etc) Dommy was sitting playing, I think he was still in leg casts at the time so really restricted in what he could do and the little boy I was going to be working with came over to play with him. I love the body language in this photo, it's like he's saying "I'll be your friend and here for you" sooo sweet!!!

This is What Friendship is All About


Under the bulldog clip is some naked and inked WOW chippie border... You know you must have chippie on all layouts ;) (coming from someone who didn't even know what chipboard embies etc were 12 months ago!!!!) Part of the challenge with the RERT is to locate a 'bonus' item to place on the LO. RES had mini kits made up that included the bonus items required (or you can use bits that you already have at home) - it is the participants job to work out from the clues which one is needed!!! This weeks clue was "Solid, strong and malleable... etched with the symbol of hope" It's the little metal embellishment with the dove on it - very sweet don't you think :)

Anyhoos, it's a side step to the work I usually do, I'm not sure if it's a style I will work with much, but I gave it a go ;)

And for the card.....

We were to create any type of card and include some style of Japanese origami. For my card I chose to make the whole thing out of origami! Well it's a card which is an envelope which is really a wallet/gift card holder... Anyways, here's what I did...


inside are little pockets where you can include up to 3 gift cards! I've used one of the childrens library cards to illustrate how the gift card goes inside.. So it's a car, and envelope and a gift all folded up into one... The way it is folded will allow it to sit up like a card as well!!! A little something different all around ;)

Tuesday, May 31, 2011

She's a Bright One This One....

in more ways than one!!! Yes the LO is bright, but the brightest thing with this one was the fact I was doing the LO based on an online challenge, and about to submit it - only to realise it was an April challenge, not a May one!! *doh* Oh well, at least I scrapped and have used one of the dreaded school photo's to boot!!! ;)

This is my little girls first official school photo, from kindergarten **sigh** How time flies, she'll be leaving primary school next year!!! Eeeeekkkk 2 in high school - how will I cope?!?!?!

The challenge I based the LO on was one centered around misting. We were to use a household item and mist with it... You probably can't tell much from mine because when I finally laid out the LO I ended up covering up my misted negative areas LOL But I used paperclips and pencils to reflect that the LO was a school based one...

Kindergarten

Again I've used some of my own Treens Trinkets creations (snail, small daisy and wire stemmed balloon) and some GORGEOUS WOW chippie!!!


To colour the chipboard little girl I've gone old school - as in textas and coloured pencils!!! Who said you need expensive supplies to work with chipboard products?!?!?! And the scalloped border is simply inked - patting it straight onto the stamp pad, nothing special there at all :) Nice and simple, quick, cheap and EASY!!!!

Sunday, May 29, 2011

Hold Onto Your Hats!!!

There must be a storm a-brewing somewhere... or something magic is afoot - because my MOJO has RETURNED!!!!!

WOOOOOOHOOOOOO!!!!

yes, I SCRAPPED!!!!!

oh and just a widdle bit excited about it hehehhe


At the moment I have 1 LO completed, and another almost there - I'm going to take some frustrations out on it tonight with the sewing machine and then I can finally say it's completed ;)

So for now, I have 1 LO to share - And it features some GORGEOUS Words or Whatever Chippie!!!!!! :)

This LO was influenced by a Cyber Crop Challenge set by Mistra over at Red Earth Scrapping :)


Haiku
Bumble Bee

WOW Chippie lamp-post is inked with gold and then had embossing powder in polysparkle melted followed by a light overlay of pewter embossing powder. The light ball is coloured with silver ink and then overlayed with diamond stickles.

My Haiku
Also a Treens Trinkets "Bling Birdie Pin"

The Haiku technically has an extra syllable in the final line (a Haiku is 5,7,5 sylables per line per stanza) but it's the best I could do, no matter how I played with it it didn't have the same feeling I was aiming for, as in description of the image followed my a title, like a poem in reverse I guess...

I'm hoping to keep the mojo flowing by joining up for the Red Earth Road Trip - it's like a series of mini challenges with no pressure to complete them all etc... Just what I need I think to get back into the swing of things... Monthly challenges and CC I feel will drown me at the moment with everything else going on with bubs etc, this road trip is a hop on/hop off kind of thing so no pressure but should give some inspiration and some cues for scrapping and keeping things ticking over ;) Well that's the plan :) No pressure - ahhh I love the sounds of that!!!! :)

Thursday, May 19, 2011

2 Weeks - Really?!?!

Wow, Time sure has flown since I last posted here!!! I can't say I've been the most productive little beaver out there of late... It seems little Aerynn has taken my mojo and has been using it to grow bigger and stronger - I don't mind sharing, but she's been a bit of a hog... that's got to change!!! Mummy's going to start setting the rules methinks!!! LOL

Anyhoos, In the meantime i've ironed out some things with Australia Post, designed a few new little bits and pieces for Treens Trinkets and decided that I'm mostly going to concentrate on TT and my DT work for the next few months until Aerynn arrives and we settle into our new adventure with her :) No pressure in other words!!! I'll participate in an online challenge or three, but not pressure myself with completing too many deadlines in regards to those (they're meant to be fun afterall, not a stress-pile at the end of each month!!! ) and do whatever the crafty whim leads me to do :) Hmmm relaxing - something I'm not very good at, but am going to work hard at working it out and doing it right!!!! :)

LOL I mean only a perfectionist control freak would be worrying about getting the art of 'relaxation' right hey bahahaha

So with that I sign off, I have a craft/scrap room that desperately needs some attention after being sick for a week (awful head cold grrr) and my family deciding as the door could be shut that it was the appropriate place to use as a dumping ground (yeah thanks for that guys!!!!)

BTW, I'm planning on having monthly or fortnightly (whichever I can fit in with my relaxation schedule (what an oxymoron that sentence is bahaha)) stockings on Treens Trinkets with a proper opening coming up - look out for it before the end of this month!!!! :)

Thursday, May 5, 2011

It's Friday....

and that means.....

at the Pretty Paper Petals Store!!!!


What flowers will be featured tonight I wonder??


Details will be released on the PPP Blog, don't forget to check it out!!!

Monday, May 2, 2011

Waiting For You - Full Reveal

Well the time has come, I can now share with you the album I've created from the WOW MDF Teddy Bear Album for our much awaited baby and will also show you how easy, simple and fun it is to alter these albums to make the covers into fun little shaker boxes!!!

Firstly here is the album!!! I love how it has come together, and the fact I was able to use pink when I live in a household full of boys and 1 tomboy was a GREAT change!!! :)


So did you see the little shaker boxes on the feet of the Teddy Bear cover? Do you want to know how to make them? Well read on :)

HOW TO MAKE A SHAKER BOX
featuring WOW mdf Teddy Bear album


To start with choose your album. Any with a fully enclosed cut out part on the front cover works best. I have used the WOW MDF Teddy Bear Album that is illustrated HERE

The materials you will need other than general scrapping supplies are:
~ sheets of acetate
~ glitter or pretties to out inside your shaker box
~ glue that is suitable for acetate - or double sided tape


Before we really get started you will need to decide what part of the album you are going to turn into a shaker box. I've decided to use the large foot pads on the bear. The sections that are 'cut' are either loose or can be easily removed for this purpose. Once you have decided on what part will become a fun toy make a template of your cover. Make sure you mark in the holes that will become the shaker box - THIS IS REALLY IMPORTANT!!!! I didn't do it on mine and wasted HOURS getting the cover decorated which should have been an easy thing to do (trust me to miss something super simple!!!)


Step 1: Cover one side of the album with glue where you are going to adhere acetate. I have used a full sheet of acetate to cover the whole of the album as I wanted the eyes and 'hands' to be clear to allow the patterned paper on the 3rd page to show through.


Step 2: Carefully lay the acetate over the required areas


and smooth the glue underneath. Don't worry too much if the glue 'bleeds out',
it can easily be cleaned up with a moistened cloth.

Allow to dry overnight. I recommend weighing the acetate and mdf to avoid any possibility of buckling.

** Not all glues adhere acetate successfully. You can use
Double Sided Tape if you prefer - make sure there are no gaps in the DST,
you don't want your pretties to escape!!!
(I had to change to DST as my glue didn't work)

Step 3: Once the glue has dried or you've adhered the acetate with DST trim around the OUTSIDE of the album to make sure there are no bits sticking out and to keep things nice and tidy.


Step 4: Flip your album over and it's time to add your 'pretties' Avoid anything too heavy as it can scratch the acetate or even worse make the seal between the acetate and MDF separate!!


Step 5: Trim up a piece of acetate to cover the back of your shaker box. Adhere using glue or DST, again making sure there are no gaps for your pretties to escape through!


VOILA!!!


Step 6: Time to Decorate. Remember the template you made? It's time for that to be used, choose what papers you wish to use to decorate and cover your MDF page with and using the template cut out the holes that will allow your shaker box to be revealed. Alternately you may wish to paint your page - as with the glue, not all paints will successfully cover acetate.

Trim, primp, decorate until you're happy with your page and enjoy!!! :)

My finished and decorated Shaker Box "Paw"